Round 2 it for next month is Shelly D our second one is still missing if you have it please get it back so we can give others a chance to have it.
December's Club is Saturday December 22 it will be the year end drawing. There will be three winners this year. 50.00, 25.00, and 25.00 There will be breakfast goodies, if possible please bring something to share
We are going to shake it up a bit and start with the yummy recipe Jan made and then show n' tell
Apple Cake with Caramel Sauce
from Real Simple
1 1/2 cups (3 sticks) unsalted butter, at room temperature, plus more for the dish
1 cup granulated sugar
1 cup light brown sugar
3 eggs
3 cups all-purpose flour, plus more for the dish
1 teaspoon baking soda
3 teaspoons ground cinnamon
1/2 teaspoon freshly grated nutmeg
1/2 teaspoon kosher salt
5 Granny Smith apples, peeled, cored, and cut into a 1/2-inch dice
1 1/4 cups coarsely chopped pecans (I omitted these)
2 1/4 teaspoon almond extract
Heat oven to 325° F.
In a large bowl, using an electric mixer on medium-high, beat the butter and the granulated and brown sugars until light and fluffy, 3 to 5 minutes. Add the eggs, one at a time, beating after each addition. In another bowl, combine the flour, baking soda, cinnamon, nutmeg, and salt. Using a wooden spoon, gradually add the flour mixture to the egg mixture. The batter should be very thick. Stir in the apples, pecans, and vanilla. Scrape the batter into a buttered and floured 9-by-13-inch baking pan (I used a bundt pan). Bake until a toothpick inserted in the center comes out clean, 50 to 60 minutes (it took 65 minutes in my oven). Transfer to a wire rack. Let cool for at least 10 minutes while you make the Caramel Glaze, if using.
With a spatula, loosen the sides of the cake. If you want to remove it from the pan, invert it onto a baking sheet, then invert it again, right-side up, onto a platter. With a toothpick or fork, poke holes all over the surface. Pour on the warm sauce. Serve warm or at room temperature, with ice cream, if desired.
Tip: This rich, moist cake travels exceptionally well in its baking pan.
CARAMEL SAUCE
- 1/2
cup butter
(no substitutions)
- 1
cup brown sugar
- 2/3
cup heavy whipping cream, unwhipped
Directions:
In a small saucepan melt butter.
Add the brown sugar; whisk until combined and thickened
(about 2 minutes).
Whisk in the whipping cream, until thoroughly blended (2
more minutes).
This sauce would be great on ice cream, French toast,
pancakes or anything edible.
Ok now for Show n' Tell
Sidney made this fun countdown calendar using a shoe organizer from walmart. This is one of those projects that I look at and think to myself "now why didn't I think of that"
Helen made these darling Santa's from Embroidery.com
Mavis made these hot pads
Nattalie Shares with us these cute mini composition notebook covers from Five Star Fonts
And this wipe holder also from Five Star Fonts
Shelly D made this fun Christmas book from Molly Mine
I love this cute bag Pat made
on the back she added a plastic pocket
Pat also made these fun Christmas pillowcases
This design is from Embroitique
She also made this adorable indoor snowball fight. The design is from Charming Station and is on sale through the end of the year if you are a member of their Yahoo group.
Kathi made towels for some of her grandkids using designs from Embroidery Library
Carol made these utensil holders from Embroidery Library go check out the other cute holders they have to make.
She made this cute ornament which is a free design from Sandy light foot
Here is Carol's pillowcase she made
and her FSL angels from Sonia Showalter Designs
Neva shows her 12 days of Christmas wall hanger Embroidery Library
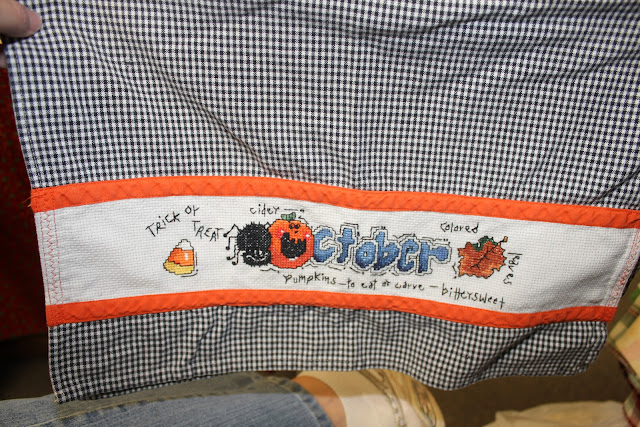
Tina hand cross stitched a towel for each month
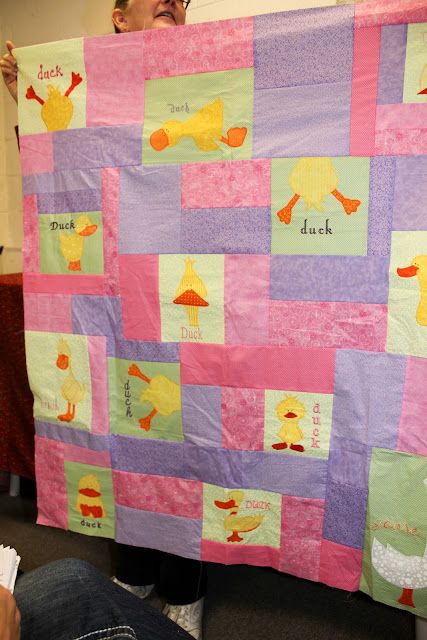
If you remember last month Tina showed the blocks she made for her duck quilt, this month she shows it all put together.
And this is her turning 20 quilt she is making for a friend
The label that goes on the back of the quilt
Donna has been busy making these fabric paper dolls
Alice shows her bear quilt she has been working on for her Grandson
Shelley W has digitized and made some ornaments
Now we will move on to show you all the cute projects Jan shared with us today.
This wish list pillow is so fun, I love the reindeer on it. The directions can be found at Embroidery Library
With a pocket on the back for their Christmas list.
pillow made from post card fabric
Here is a red work Santa that she put in an embroidery hoop
Happy Holidays pillow
Love this mitten pillow she found the idea on Pottery Barn. You could put little treats in each mitten.
How about a button Santa? So cute all framed up ready to display.This is a great idea. She got the frame from the dollar store and added the hooks then embroidered the saying which is from Embroitique and is currently on sale.
Here is another one that she did. The frame is from the dollar store and she added the hooks.
Here she used the valance from the dollar store and embroidered the a few different nativity scenes on it. The designs are from Embroidery Library and come in two different sizes.
Here is the table runner from the dollar store with some simple bells embroidered on to it
We have all seen the mustaches taking over. Here is a fun one to put on a shirt. The design is from Urban Threads
Jan made this wall hanging (North pole) and a pillow cover
What a darling elf. So many fun things you can do with it.
Here it is made into a doll
and on a small bag. The original elf was not done as embroidery and can be found here and was digitized for embroidery by Jan
I love this topper Jan made to hold a towel. Just slide the towel over the ribbon and the topper down
and you have this cute hanging towel.
here are some ornaments she made as well.
A couple of things before we are done. Gwen shared with us how to make a 10 min table runner Here is the video tutorial if you are wanting to make one.
Also Kathi demonstrated how to make a "magic stocking" and for ease of time HERE is a link to directions to show you how it is done. These are NOT the instructions she shared with us, but it is the same concept. The only difference is that she did not cut out the stocking shape first as they show in the directions. She layered her fabirc and layed her stocking template on top and cut all layers out at the same time. I am sure either way would work.
Hope to see you all at December's Club


