First off lets give a big welcome to our new club teacher Terrie.
Don't forget you can download this months designs Here. Remember you have to create a free account with 4shared before you can download them.
This month at embroidery club Kathi showed us how to do Machine smocking using an embroidery machine.
Here is the information from the class.
Smocking
on your
Embroidery Machine
It is possible to smock using your embroidery machine. Designs must be
digitized especially for the smocked look. You can use these designs to sew on
unpleated fabric but you can't use regular designs to make smocked pieces.
Design sites are not easy to find. Here are a few I found:
Martha Pullen
Janny Primrose
Elegant Stitches
SWAK embroidery designs (this site has many free smocking designs)
You must use a pre-pleated insert or item of clothing. I found inserts
and clothing on the following sites:
-Smocking Bonnet
-Garden Fairies Trading Company (these seemed to be the least expensive
but I don't know what shipping is)
-Etsy
-Ebay
-Elizabeth's Embroidery
-Labours of Love Heirloom Sewing
-Bonnet pattern is from Bamba Bella.com
If you can, order them with the pleating done in all white thread. It
won't show as much in the finished product.
Imaginations 4 Smocking is where I got the white and gingham checked
dresses.
The green and pale peach were from Ebay.
Materials:
Pre-pleated item
Wash away sticky back stabilizer
Smocking designs
Large tooth comb (optional but helpful)
Thread, scissors, you know the
drill
Hoop stabilizer, paper side up. Set aside. Measure design and pleated
area. You can either stretch item to fit design, or pull in threads. You must make sure pleats are evenly spaced,
straight and with no puckers.
A comb helps get them spaced right. I did most of the adjusting by hand,
but used the comb to very lightly space them. Don't go to deep as it will pull
the thread and you'll have to start all over. (LOL-did that)
Take a pin and carefully scratch paper around the edges in your hoop.
Then make an X. Pull away paper to reveal sticky backing. Carefully place fabric on backing. You may
have to adjust, so don't press until you're satisfied with the look.
Place on machine. If possible raise foot so it won't drag on fabric.
Embroider as directed
Cut from hoop and rinse thoroughly.
Backstitching: This is used as a background stitch on designs that are
not close enough together to hold the pleats in place. It is a free design on SWAK. It is usually
done in white, or color to match fabric, before you start the smocking.
Tips I found out the hard way:
1 Tear away will work, I hooped the tear away and glued the edges of the
fabric down and then PINNED a lot. Its really hard to tear away all the little
pieces but I used the insert on the pillow so it didn't matter.
2 If your design is too small for the item (yellow dress), you can use
some stitches to keep pleats from moving. I found the 3 stitch straight stitch
worked well. This is done on the regular machine. I am sure there are others I
just haven't found them.
3 On a bishop design the hardest part is getting the neckline correct.
Take the time to make sure it is lined up correctly. Pin all around a few
inches from neckline. Run first row of smocking and then remove pins. Finish
design.
Smocked designs can be used on pillows, aprons, dresses, shirts,
bonnets, Christmas ornaments. Use your imagination. Someone even mentioned
along the bottom of little girls pants.
I love smocking this way. It is so much faster and more even. Hope this
helps you a little and that you'll enjoy it too.


 another cute machine smocked pattern.
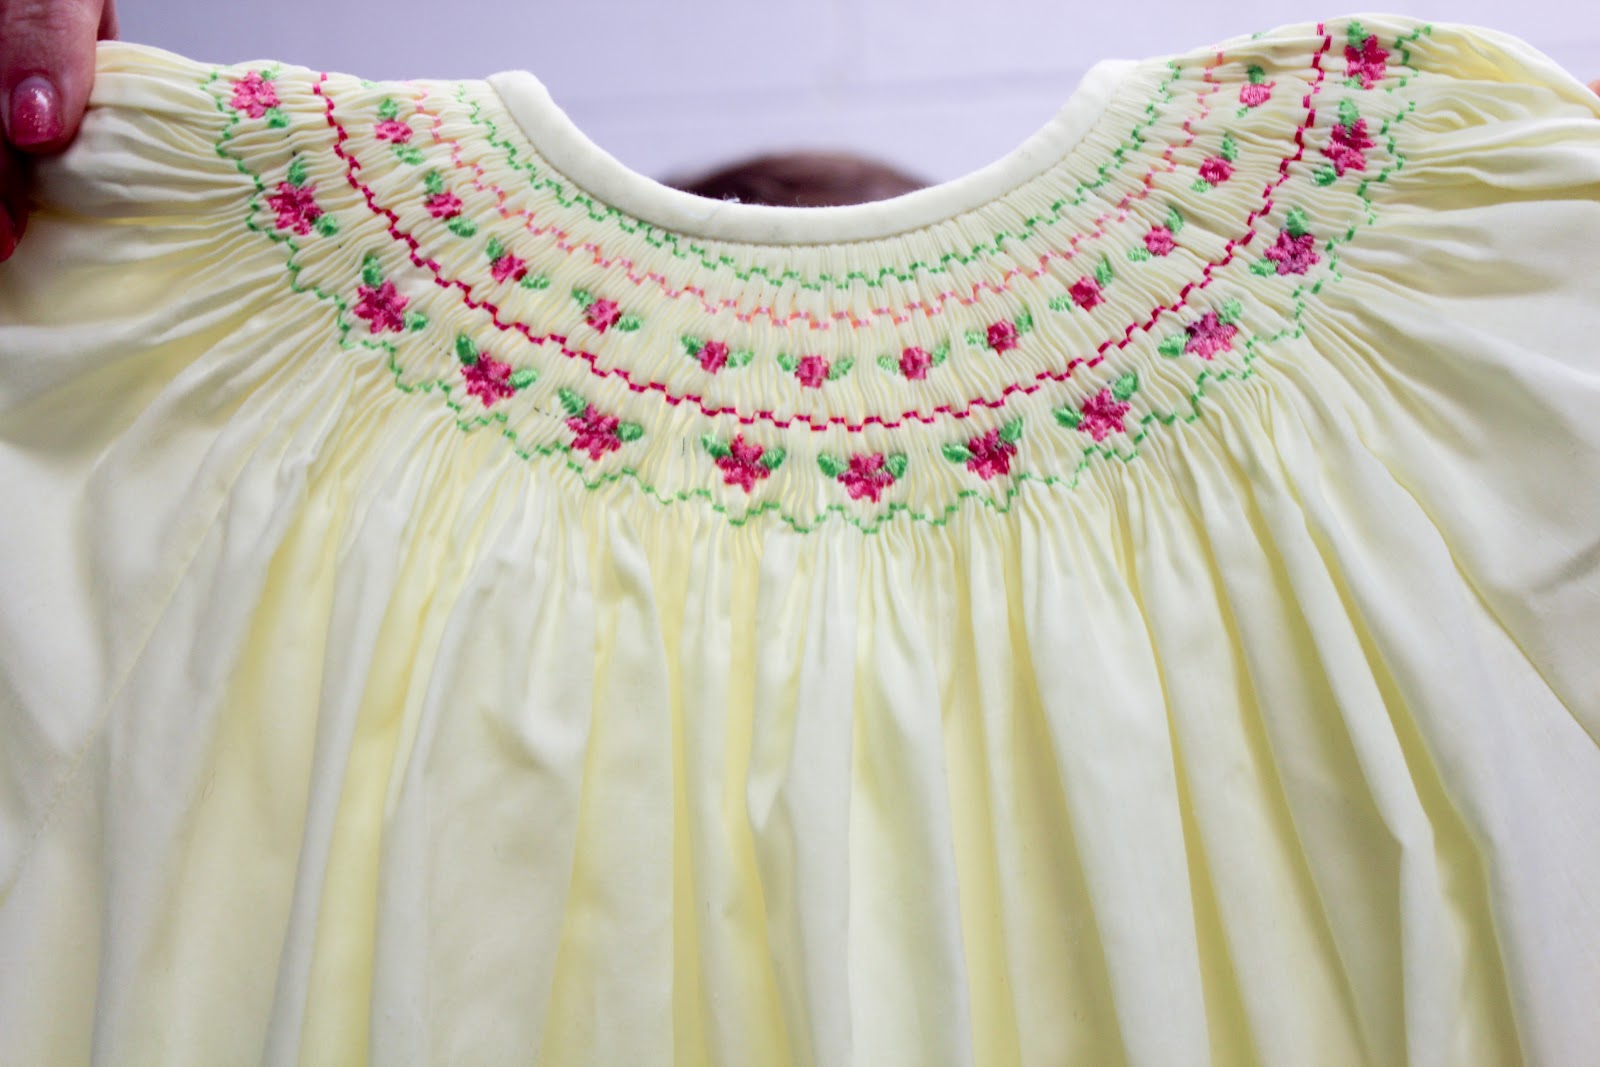
here is a close up of the design.
Jan as usual had lots of cute things to share with us this month.

A cute fabric flag that she has framed. This would make a cute addition to a mantel or table.

She made this cute wall hanging using her fabric from the fabric challenge (the middle blue square) and a free firework design she found from amazing designs. If you haven't downloaded yours go Here to get it.

How cute is this watermelon pillow. Sew your red fabrics together then cut your shape. What a cute, fun summer project.

Here is her dollar store hat that she has changed the band on ( I didn't get a picture of it last month so I can't remember what she put on it) and added a fabric pin wheel.

How cute is this dishtowel holder.

Run to the party store to get your star cut outs (She used the cut outs as a template for her fabric) so you can make this cute project. It can be used as a table runner or a banner, or even to hang on a door or wall. So many possibilities and so cute. Embellish with embroidery, flowers, yo-yo's, fabric pinwheels, buttons...the list could go on, use your imagination and have fun.

Keep your kids busy outside, or at the pool this summer with this cute tic-tac-toe towel. She has added fabric to both ends to make it fun, then used webbing to make the tic-tac-toe box. Make up some of these Cute monsters that we saw last month for playing pieces.

Here is another cute towel idea. Embroider your design add a cute fabric ruffle and some ric rac to the bottom and use ribbon and ric rac to tie and hang at the top. The flag design is from Planet Applique and right now is on sale for only 1.00

Look at this adorable pillow case dress, made from an actual pillow case. She added a ruffle and ric rac to the bottom and a pin to the front.

here is a look at the back with the cute bow to tie it closed.

Here is the firework table runner she made. Isn't this just so fun and patriotic? Here are the directions so you can make one for your table.
Quilted Firework Table Runner
To make this project, you will need:
* 1 piece of red fabric‐ 11" x 13 1/2"
* 1 piece of blue fabric‐ 11 x 13 1/2"
* 1 piece of white or cream fabric‐ 18" x 13 1/2"
* 2 borders of light blue fabric‐ 3 1/2" x 45"
* 1 package of red medium rick rack (2 1/2 yards)
* 3 yards of blue 1/8 inch ribbon
* thread that matches the ribbon
* assorted fabric for 8 small stars and 5 large stars in reds and blues (I used six
different fabrics‐‐ all scraps!)
* red fabric for center circle‐ 2 3/4" wide
* Wonder Under
* 1/4 yard red fabric for binding
* 5/8 yard fabric for backing
* quilt batting
Instructions:
1. Using a scant 1/4 inch seam, piece together the blue to the white fabric sewing
the 13 1/2" edges together. Piece together the red to the white. This creates the
center piece. Press seams toward dark fabric.
2. Lay the rick rack against the long side of the center piece. Sew into place with a
scant 1/4 seam. (Keep your stitching on the outer edge of the center line of the rick
rack.)
3. Lay border fabric on top of the rick rack and pin into place. The border is longer
than the center and will be trimmed after it is sewn. Turn the fabric over and
following the line of your stitching of the rick rack, stitch into place. Repeat on other
side of runner.
Once both sides are sewn, trim even with the center
4. Press rick rack towards the border.
5. Make the stars and circle by tracing pattern to the smooth side of wonder under.
I used cookie cutters and a cup... but I made a printable template for you.
Iron to the wrong side of fabric.
Cut out.
Lay out the circle roughly in the center and the stars around it in a pleasing pattern.
6. Working from the circle lay out ribbon connecting to each star and cut leaving an
extra 1/2 inch to fit under the circle and star.
7. Pin circle, stars and ribbon into place.
8. Using matching thread, stitch the ribbon into place. You will need to remove the
circle. Remove each star when you stitch ribbon and then pin it back into place
immediately to keep it organized.
9. Stitch around circle and stars using decorative stitch. (I used a small blanket
stitch. My mom would never consider doing anything but applique! Do what suits
you.) Press well.
10. Layer top, batting and backing and quilt. I am lucky enough to have my very
talented Aunt Karen who quilted it together beautifully on her large quilting
machine. Her company is called Stitched in Time (which she did!) You can also quilt
by hand or on your sewing machine.
11. Sew on the binding. (if you want to make this project really easy, you can skip
the binding by layering the top to the backing right sides together. Place the batting
to the wrong side of the top. Stitch around the outer edge, leaving a 6 inch opening
at the bottom. Turn and press. Stitch the opening closed. Quilt together.

Here is a fun idea using the towels the store sells.

The store also has this fun fabric that looks like it has been pieced together (without the work of piecing it together...YAY for easy) Jan made this fun wall hanging using the fabric.

Here is Jan's cute badge she made.

she added fabric flowers to her flip flops.

Look at Terrie's cute shirt she made using the big ric-rac and a cute bow. She also made the American girl doll clothes. I love that she made it to match her.

She also made these adorable clothes and used her fabric from the fabric challenge to make the shoes.

Terrie designed and made this cute sailor outfit for Kit.

I have a daughter that loves American Girl dolls and clothes and so I talked to Terrie after club and found out that she makes and sells clothes and some patterns and has a website. So if you have a little one or big one who loves American Girl dolls and clothes go check out her site All Dolled Up
Now onto show n' tell

Look at the amazing quilt that Tina did. I love the colors

Tina has been busy. Here is another amazing quilt she made.

Nattalie made these cute luggage tags from Five Star Fonts and star hair felties from GG Embroidery desgins
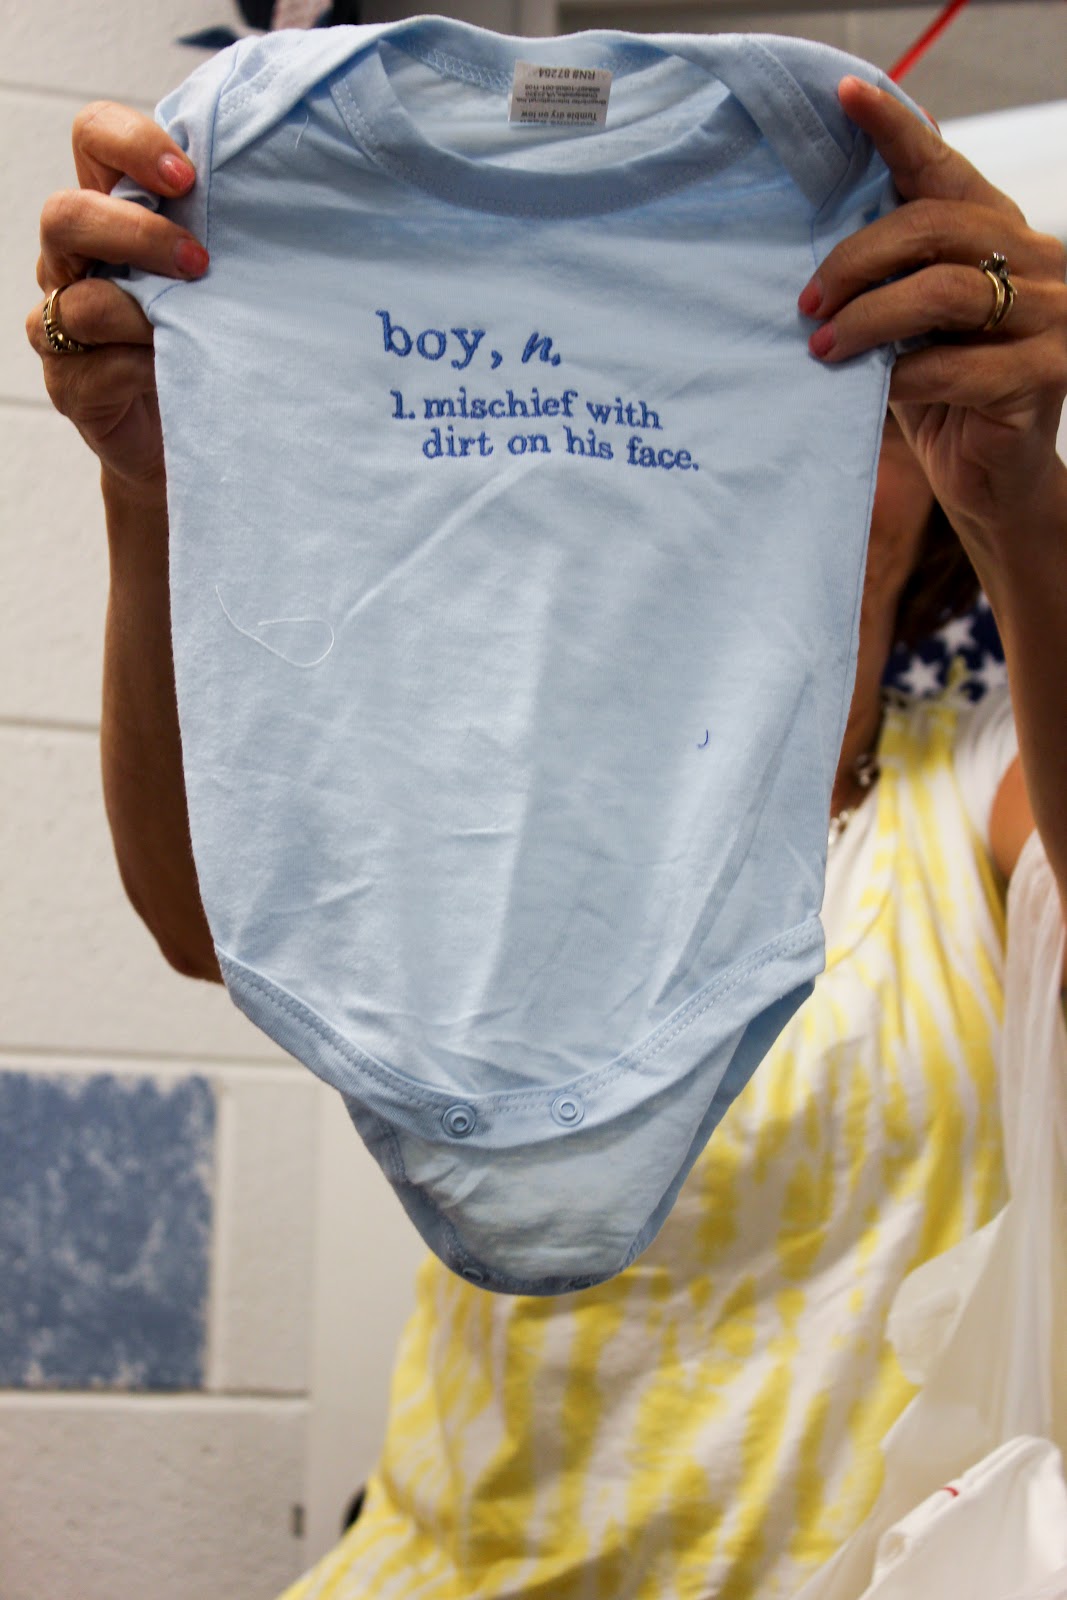
Shelly D has been busy sewing for her grandson. Here is a onesie she made. I think every little boy needs a shirt with this saying on it.

She bought one of the onesies from the store and put a firework design on the front. (this is the free design from amazing designs that Jan also used above.

on the back she did a cute applique U.S.A.

She also made this one with little slugger on the front, and

and his name and age on the back.

Sydney's cute granddaughter(Kara) came all dressed up as Cleopatra

Vivian attended the Murray's store club and was challenged to make something using a dish towel, so she is making a bag with it.

Lydia designed the pattern for and made this pretty pony and friend.

Pat used her fabric challenge fabric and made this fun 4th of July pillow. The design is from Embroitique.

She also make this cute wreath using a small 1 inch(I believe) felt square and folding them then pinning them to the wreath

Bev made a quilt block using her fabric challenge fabric.

Alice made this burp cloth that matches her bib from last month.

She also bought one of the onesies from the store and embroidered daddy's #1 fan

and his dad's number-21 on the back

She also made this fabric flag for her grandson to hold in the parade.
 Sorry, I can't remember who made these 3 sets of felt hair clips The cowboy boots and bunnies are from GG deisgns The pin wheels are from Embroidery Garden.
These baby blankets are made for babies that pass away.

Shelley W. made these cute patriotic pins.
A quick thank you to Artel who brought and shared mesh with everyone who wanted it for the project last month.
If I have forgotten anything email me and I will get it put on.